
Arduino Long Range Bluetooth Tutorial: Push Beyond 50KM with the MultiNav Pro+ BLE Module
RFOXiA Long Range Bluetooth Module
The Arduino Long Range Bluetooth Tutorial Every Serious Builder Has Been Waiting For
If you've spent any time searching for an arduino long range bluetooth tutorial, you've probably run into the same wall every other hardware developer hits: standard Bluetooth modules top out at 80–100 meters. You follow the tutorial, wire up your Nordic or Silicon Labs module, upload your sketch, and then watch the connection drop the moment you walk to the other end of your yard.
That's not a wiring problem. That's not a code problem. That's a fundamental hardware limitation that no amount of software optimization can fix.
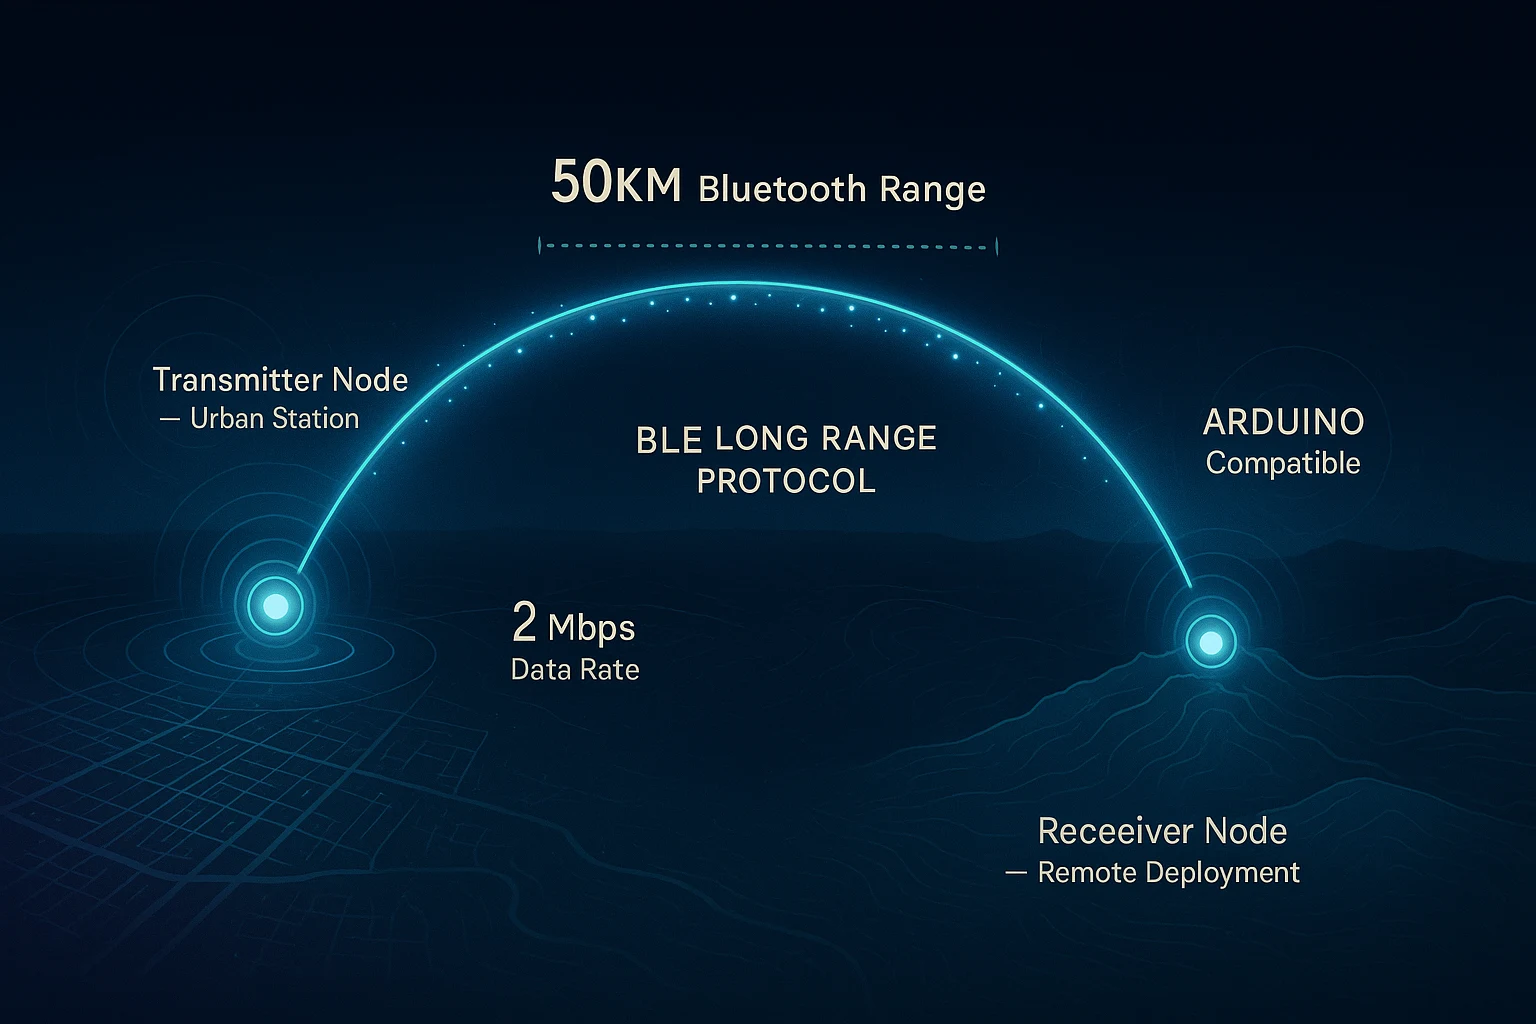
This tutorial is different. We're going to walk through building a long-range Bluetooth communication system using the RFOXiA MultiNav Pro+ BLE Module — a professional-grade wireless module that achieves 5KM ground-to-ground range when paired with a smartphone, and beyond 50KM when two modules communicate directly in an elevated configuration. It's FCC certified, fully open source, programmable via SWD, and it costs $59 for two units.
This is the hardware that makes the tutorial actually work at range.
Why Standard Arduino Bluetooth Modules Fail at Long Range
Before we get into the build, it's worth understanding why this problem exists — because it shapes every decision you'll make in a real long-range wireless project.
The HC-05, HC-06, HM-10, and similar modules that dominate Arduino tutorials are built on Bluetooth Classic or standard BLE radio chipsets with minimal RF front-end design. They output low transmit power, use low-gain integrated antennas, and have limited receiver sensitivity. In ideal open-air conditions, 100 meters is generous. In real-world environments with obstacles, interference, and multipath reflections, 30–50 meters is typical.
Long-range wireless communication requires three things that commodity modules don't provide:
- High transmit power — amplified RF output that reaches farther before the signal floor drops below detectable levels
- High receiver sensitivity — the ability to decode weak incoming signals that standard receivers would reject as noise
- Optimized antenna design — efficient radiation patterns that direct energy where it's needed instead of scattering it
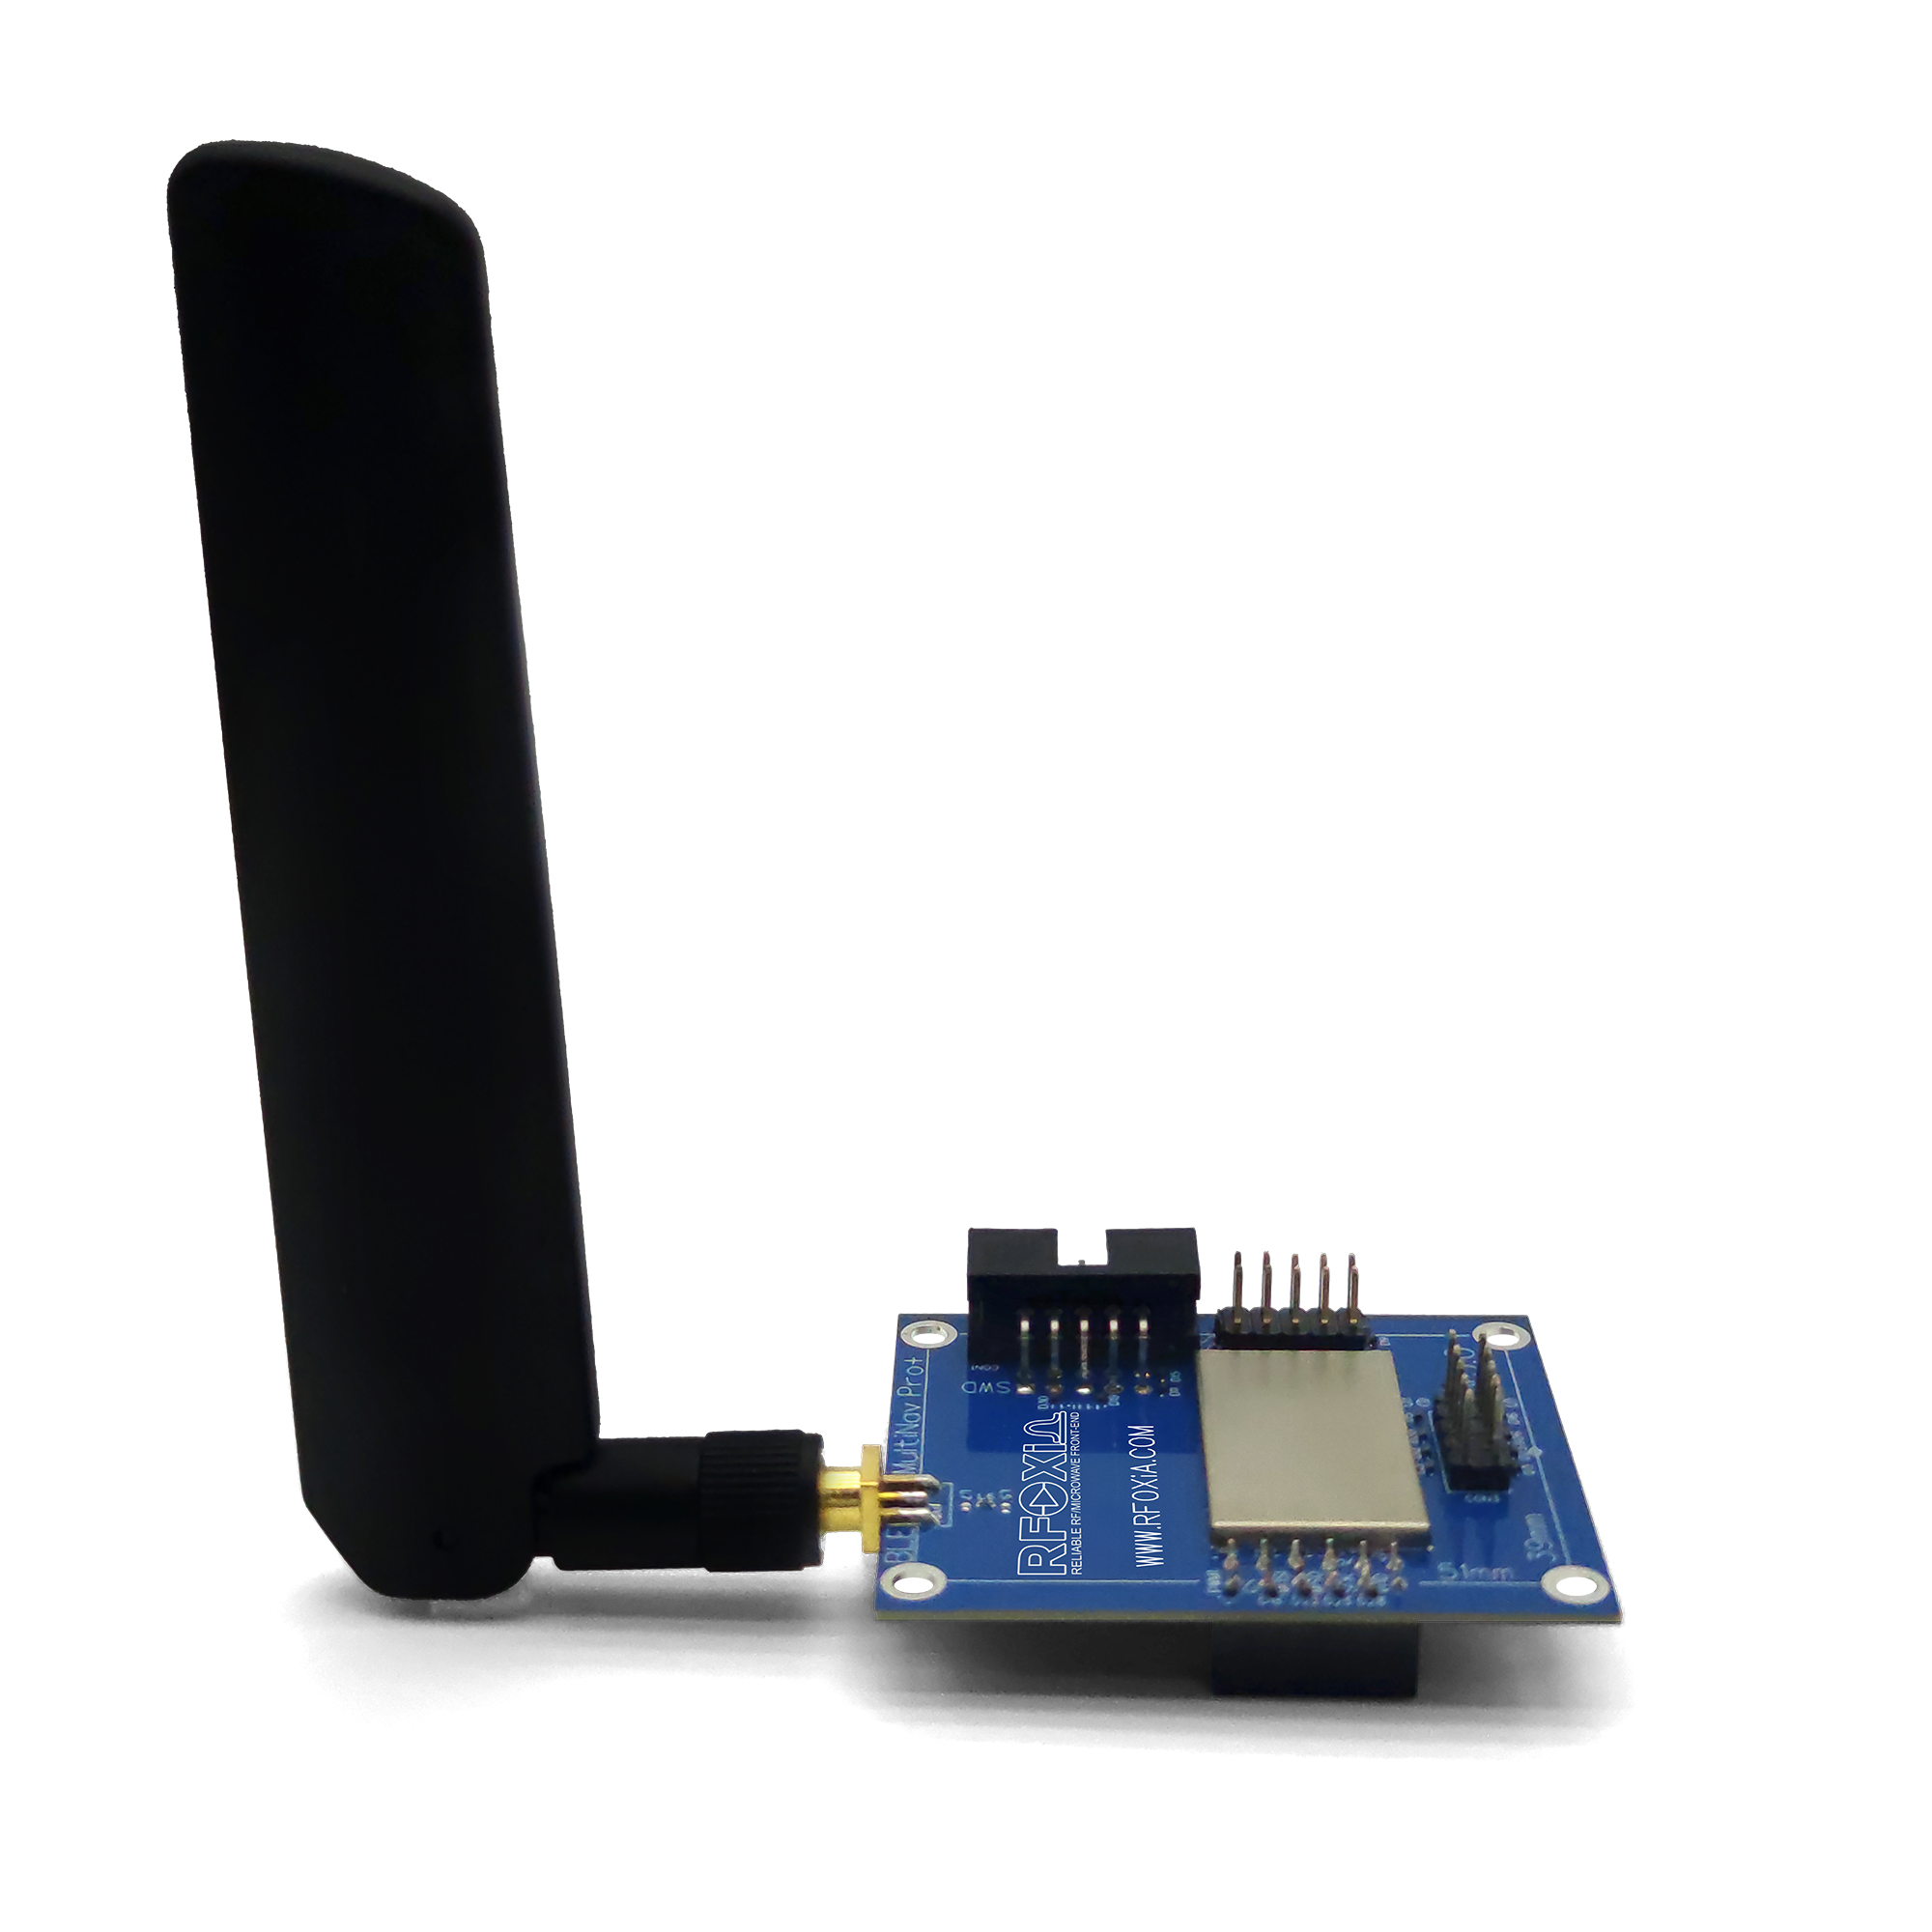
The MultiNav Pro+ BLE module addresses all three through a dedicated RF front-end architecture, external power amplifiers, and a tuned high-gain chip antenna with a 140mm antenna length. The result is a module that operates in a completely different performance class than anything else at this price point.
Understanding the MultiNav Pro+ BLE Module Architecture
Before writing a single line of code, understanding the hardware architecture will help you build more reliable systems and debug faster when something doesn't work as expected.
The Processing Core
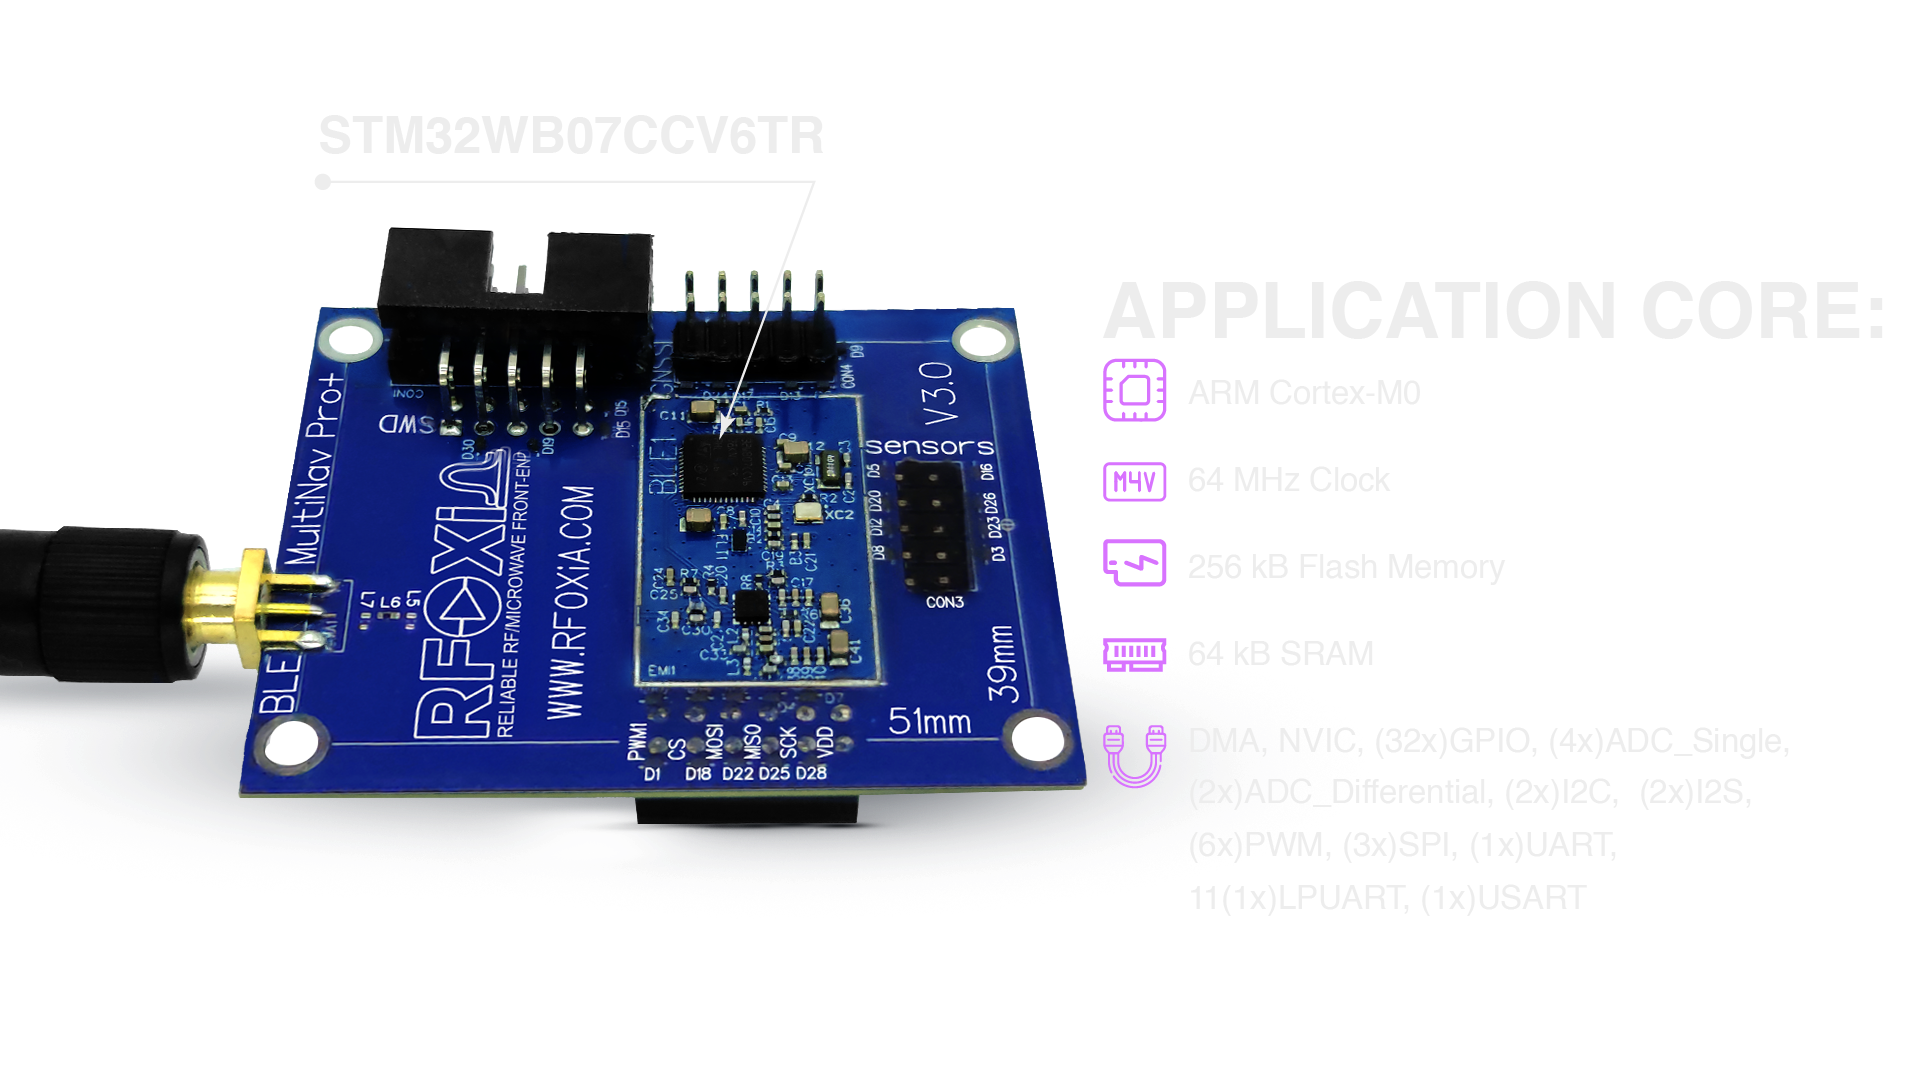
At the heart of the MultiNav Pro+ BLE is the STM32WB07CCV6 — a dual-core wireless microcontroller from STMicroelectronics. One core manages the BLE protocol stack, while the second core runs your application firmware. This separation means BLE communication overhead doesn't compete with your application logic for processor time, giving you more predictable timing and better overall system responsiveness.
This is significantly more capable than the simple UART-passthrough architecture used by HC-05 or HM-10 modules, where an external Arduino handles all logic while the module just passes serial data through a Bluetooth pipe.
Range Breakdown by Configuration
Understanding the range specs requires understanding how radio propagation works in different scenarios:
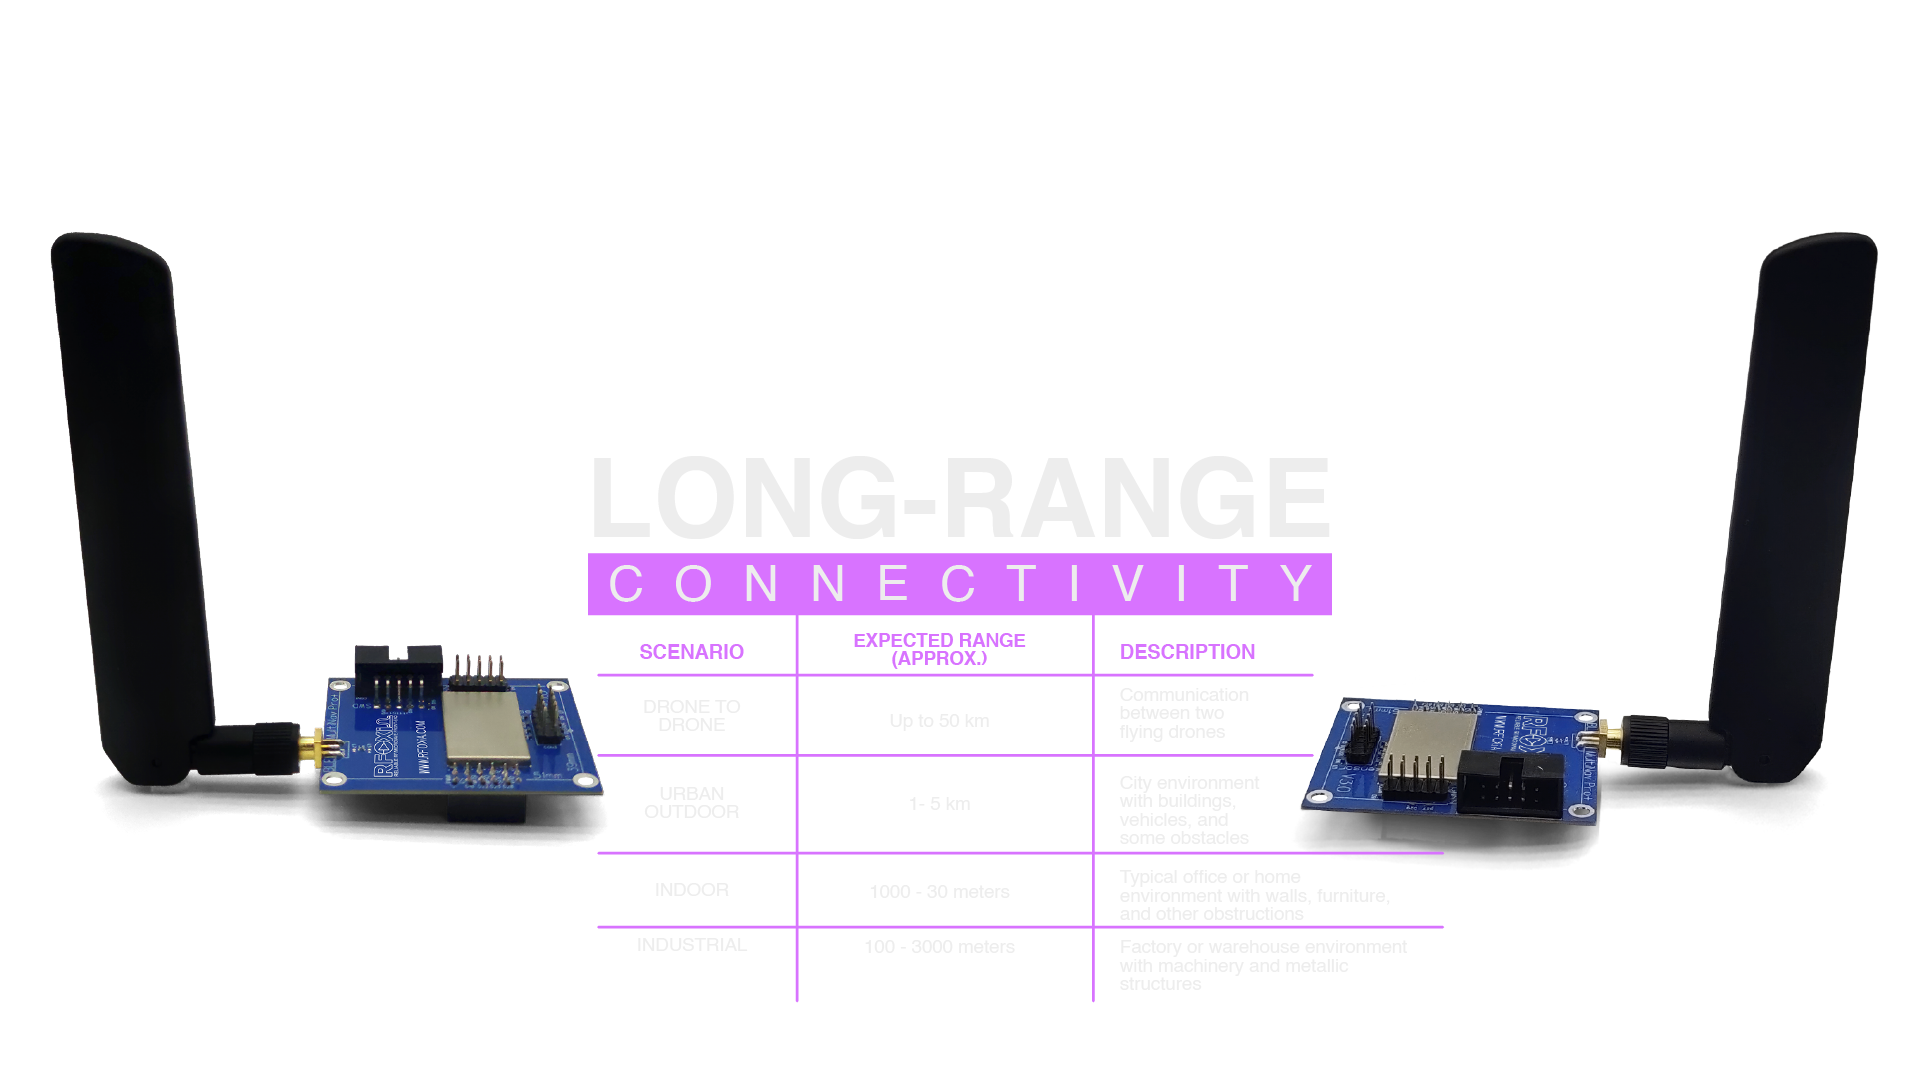
- Ground-to-ground (5KM): Both modules at ground level, paired with smartphones. Ground reflections and terrain obstacles reduce effective range but 5KM is still 50x better than commodity modules.
- Man-to-drone (15–20KM): One module on the ground paired with a phone, one module elevated on a drone. The elevated module escapes most ground-level interference, dramatically extending range.
- Drone-to-drone (50KM+): Both modules elevated, ground reflections essentially eliminated. This is the theoretical maximum under ideal conditions and represents the absolute frontier of what BLE can achieve.
Physical Specifications
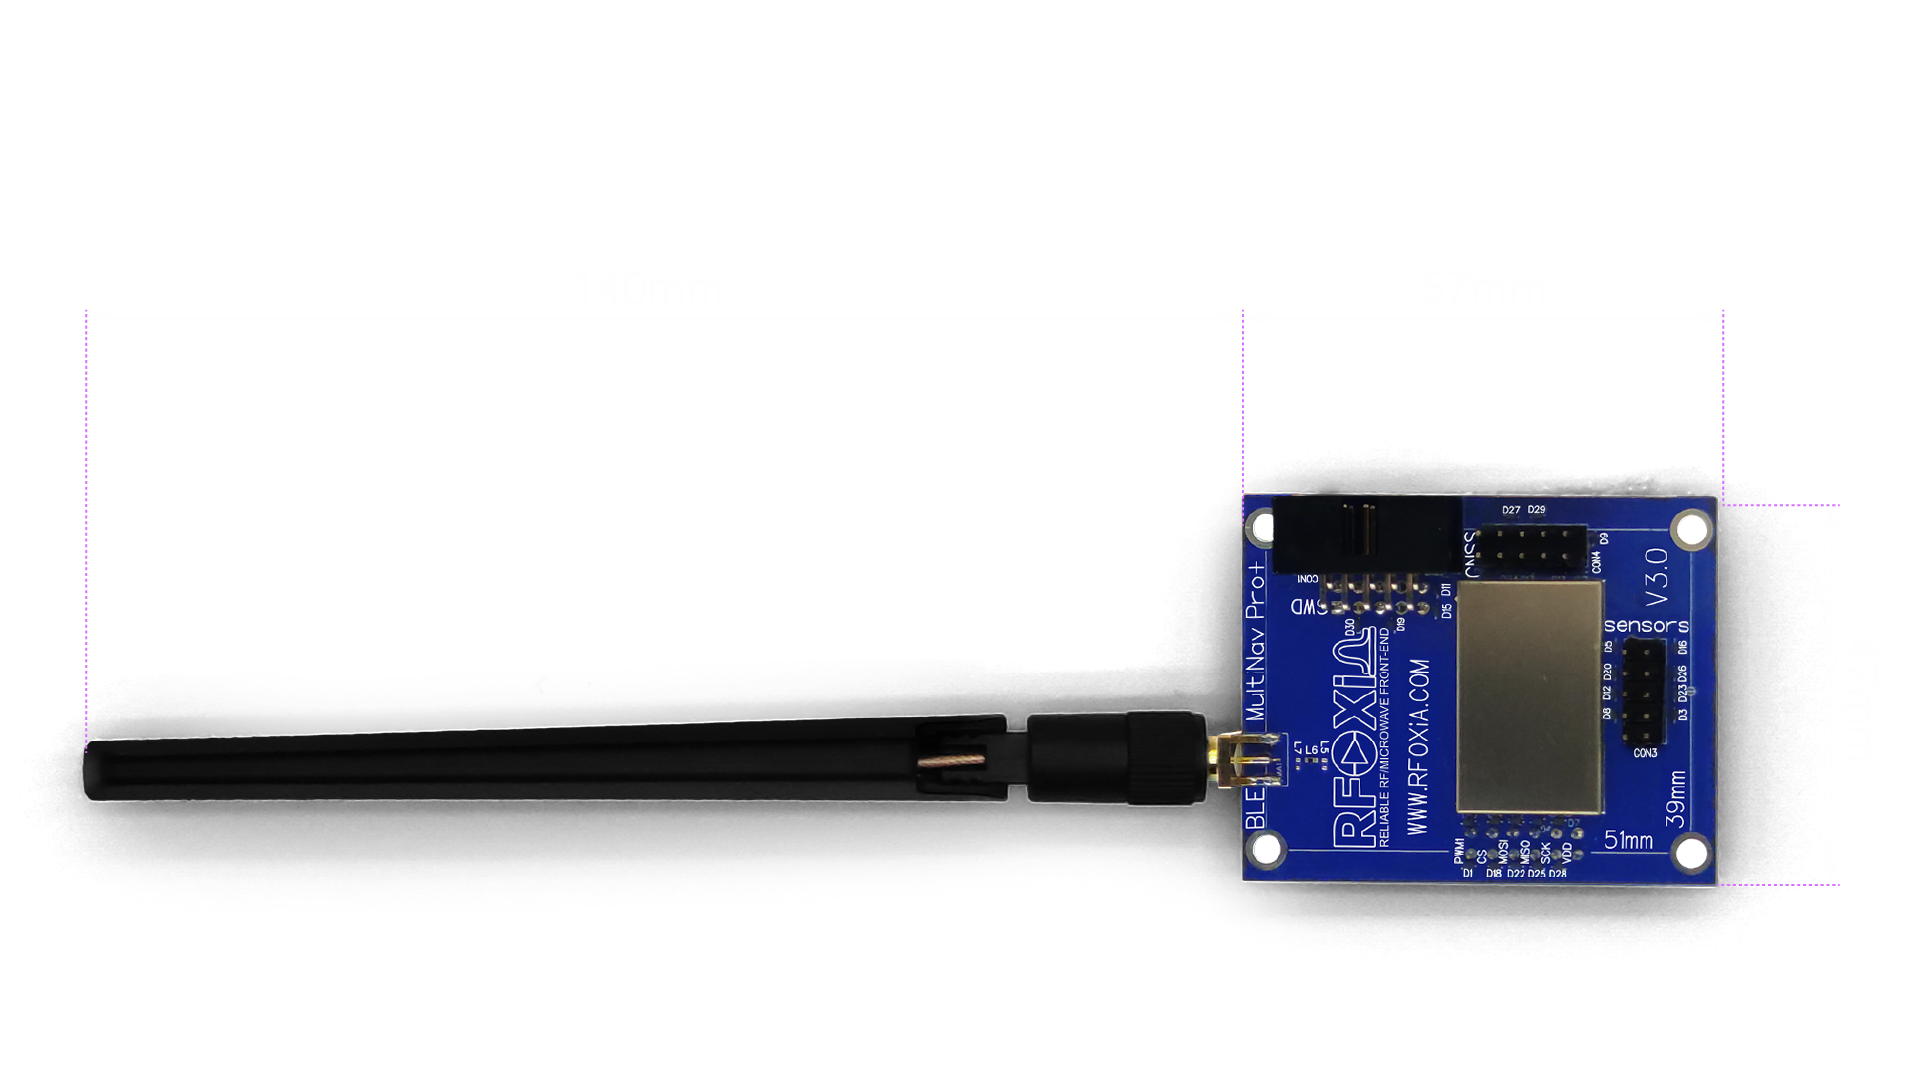
The module measures 57mm × 47mm with a fixing frame size of 54mm × 34mm featuring corner mounting holes. The antenna extends to 140mm. This form factor was designed to be integration-friendly — compact enough for FPV builds, robust enough for industrial deployments, and with proper mounting points for secure attachment.
What You Need for This Arduino Long Range Bluetooth Tutorial
Hardware Requirements
- 2× MultiNav Pro+ BLE Modules (RFOXiA Long Range Bluetooth Module) — $59 for a pair
- STLink programmer (included in Power/Program Kit, or standalone)
- 3.3V regulated power supply or the RFOXiA Power/Program Kit
- Connecting wires and breadboard or PCB for prototyping
- Android device with RFOXiA Connect app installed (iOS pending App Store approval)
Software Requirements
- STM32CubeIDE or STM32CubeProgrammer (free from STMicroelectronics)
- The MultiNav Pro+ BLE firmware source code from GitHub: https://github.com/RFOXiA/MultiNav-Pro-Long-Range-BLE-Module-Firmware-STM32WB07
- RFOXiA Connect app (Android — available now)
Note: While the module uses STM32 architecture rather than the traditional AVR-based Arduino, the workflow and concepts translate directly. If you've worked with Arduino before, you'll be comfortable here. The firmware is open source, well-documented, and the AI Firmware Builder on RFOXiA Club can generate custom application code in plain language.
Step 1: Setting Up Your Development Environment
Installing STM32CubeIDE
Download STM32CubeIDE from the STMicroelectronics website. This is the primary IDE for STM32WB07 development. Installation is standard — follow the on-screen prompts for your operating system (Windows, macOS, or Linux are all supported).
Cloning the Firmware Repository
Open your terminal and clone the MultiNav Pro+ BLE firmware:
git clone https://github.com/RFOXiA/MultiNav-Pro-Long-Range-BLE-Module-Firmware-STM32WB07
cd MultiNav-Pro-Long-Range-BLE-Module-Firmware-STM32WB07
The repository contains the full firmware source including BLE stack configuration, GATT service definitions, RF parameter settings, and example application code. Review the README for project structure overview before opening in the IDE.
Opening the Project
In STM32CubeIDE, use File → Import → Existing Projects into Workspace and point to the cloned repository folder. The project should import with all configurations intact.
Step 2: Understanding the Firmware Architecture
The firmware separates into three primary layers:
Radio Layer — RF parameter configuration, power amplifier control, receiver sensitivity settings. You generally don't need to modify this unless you're doing advanced RF optimization.
BLE Stack Layer — GATT server/client configuration, service and characteristic definitions, connection parameter management. Modify this when adding custom BLE services.
Application Layer — Your user logic. This is where you implement your specific use case — drone telemetry parsing, sensor data aggregation, command processing, etc.
The open-source nature of the firmware means you have full visibility into every layer. There's no black box. When something behaves unexpectedly at 3KM that works fine at 100 meters, you can trace exactly what's happening at the radio parameter level.
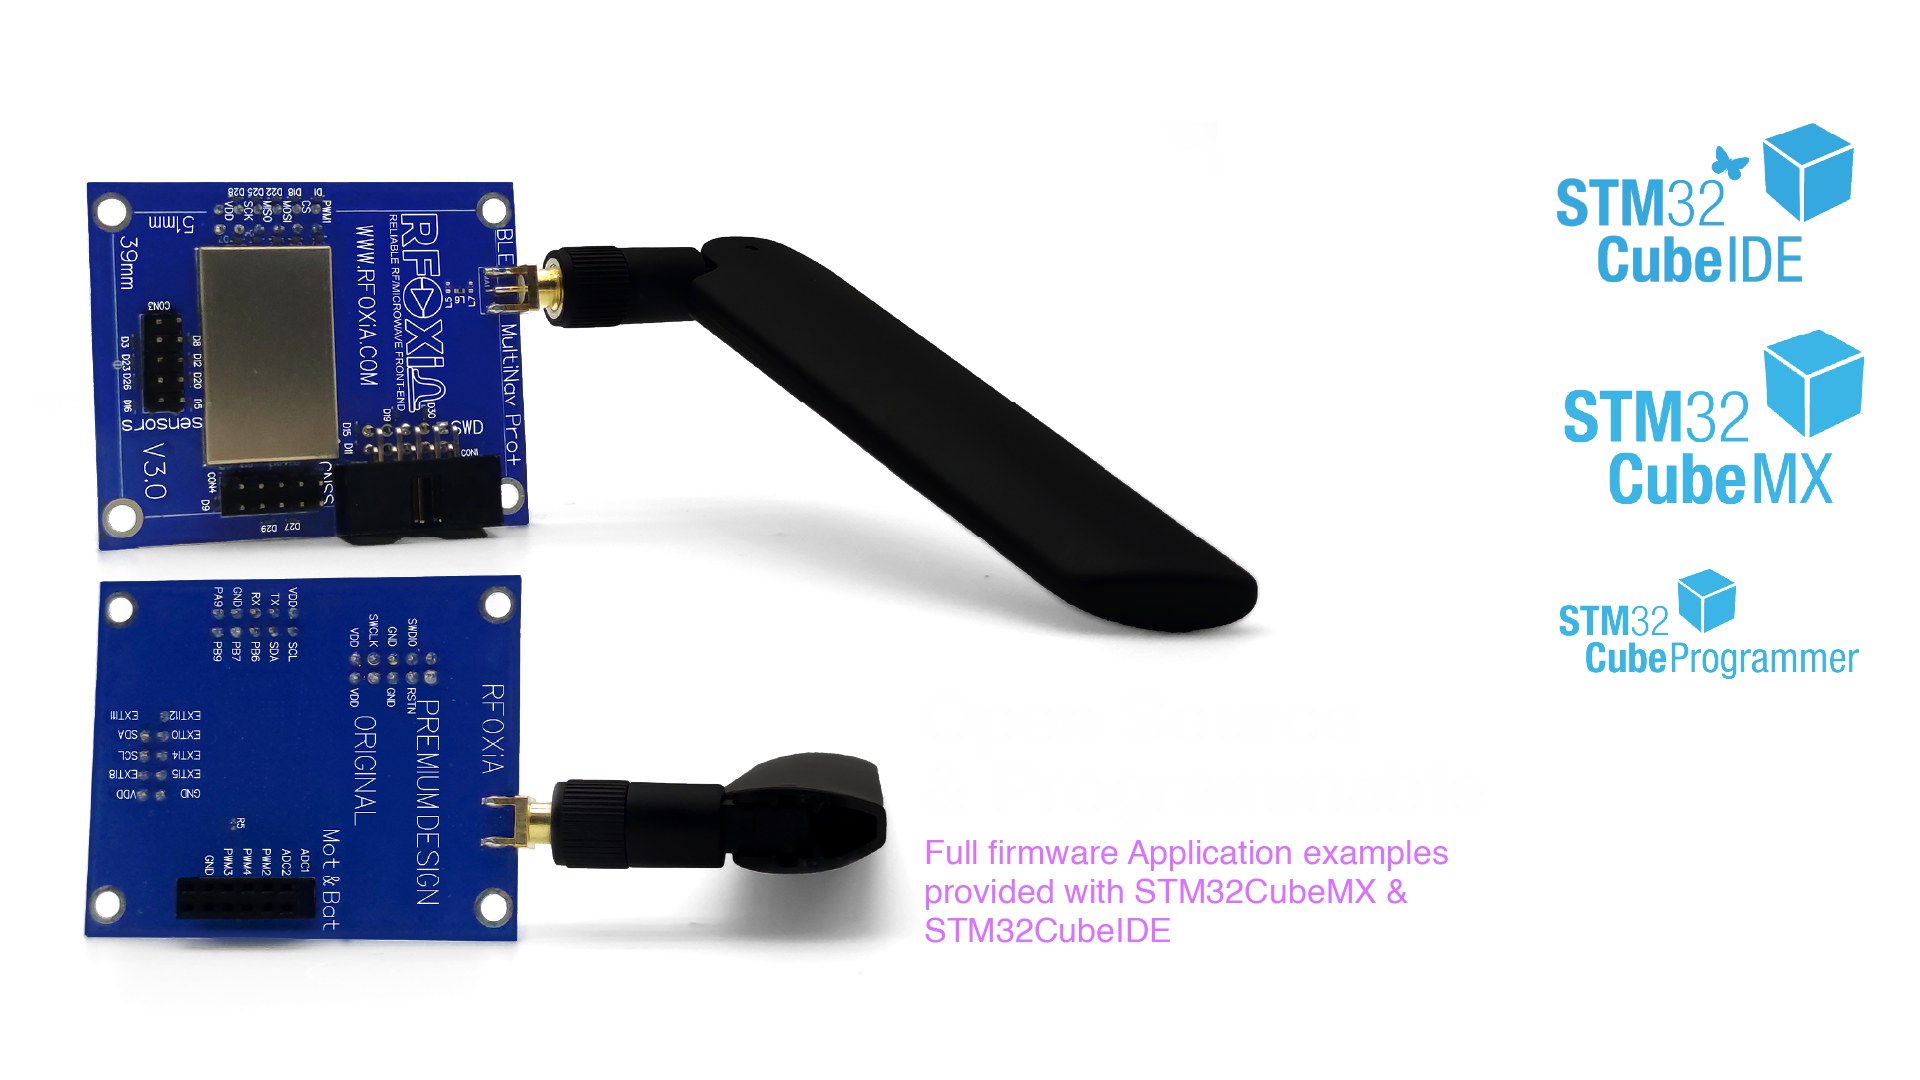
Step 3: Programming the Module
Connecting via SWD
The MultiNav Pro+ BLE uses SWD (Serial Wire Debug) for programming — the same interface used by professional STM32 development boards. Connect your STLink programmer to the module's SWD interface:
- SWDIO → SWDIO
- SWDCLK → SWDCLK
- GND → GND
- 3.3V → VCC (if powering from programmer)
The RFOXiA Power/Program Kit includes an integrated STLink interface, making this connection straightforward without needing a separate programmer.
Building and Flashing
In STM32CubeIDE:
- Build the project with Project → Build All (Ctrl+B)
- Connect your STLink
- Flash with Run → Debug or Run → Run for direct programming
- Verify the console shows successful flash completion
Repeat for your second module. Both modules should be running identical firmware for peer-to-peer operation unless you're implementing a specific asymmetric architecture (central/peripheral roles).
Step 4: Configuring BLE Parameters for Maximum Range
This is where the arduino long range bluetooth tutorial diverges most significantly from standard tutorials. For maximum range, several BLE parameters need to be configured correctly:
TX Power
The STM32WB07 supports configurable TX power levels. For maximum range, set TX power to the maximum permitted value. In the firmware, locate the hci_le_set_transmit_power_reporting_enable() or equivalent power configuration call and set it to maximum output.
PHY Selection
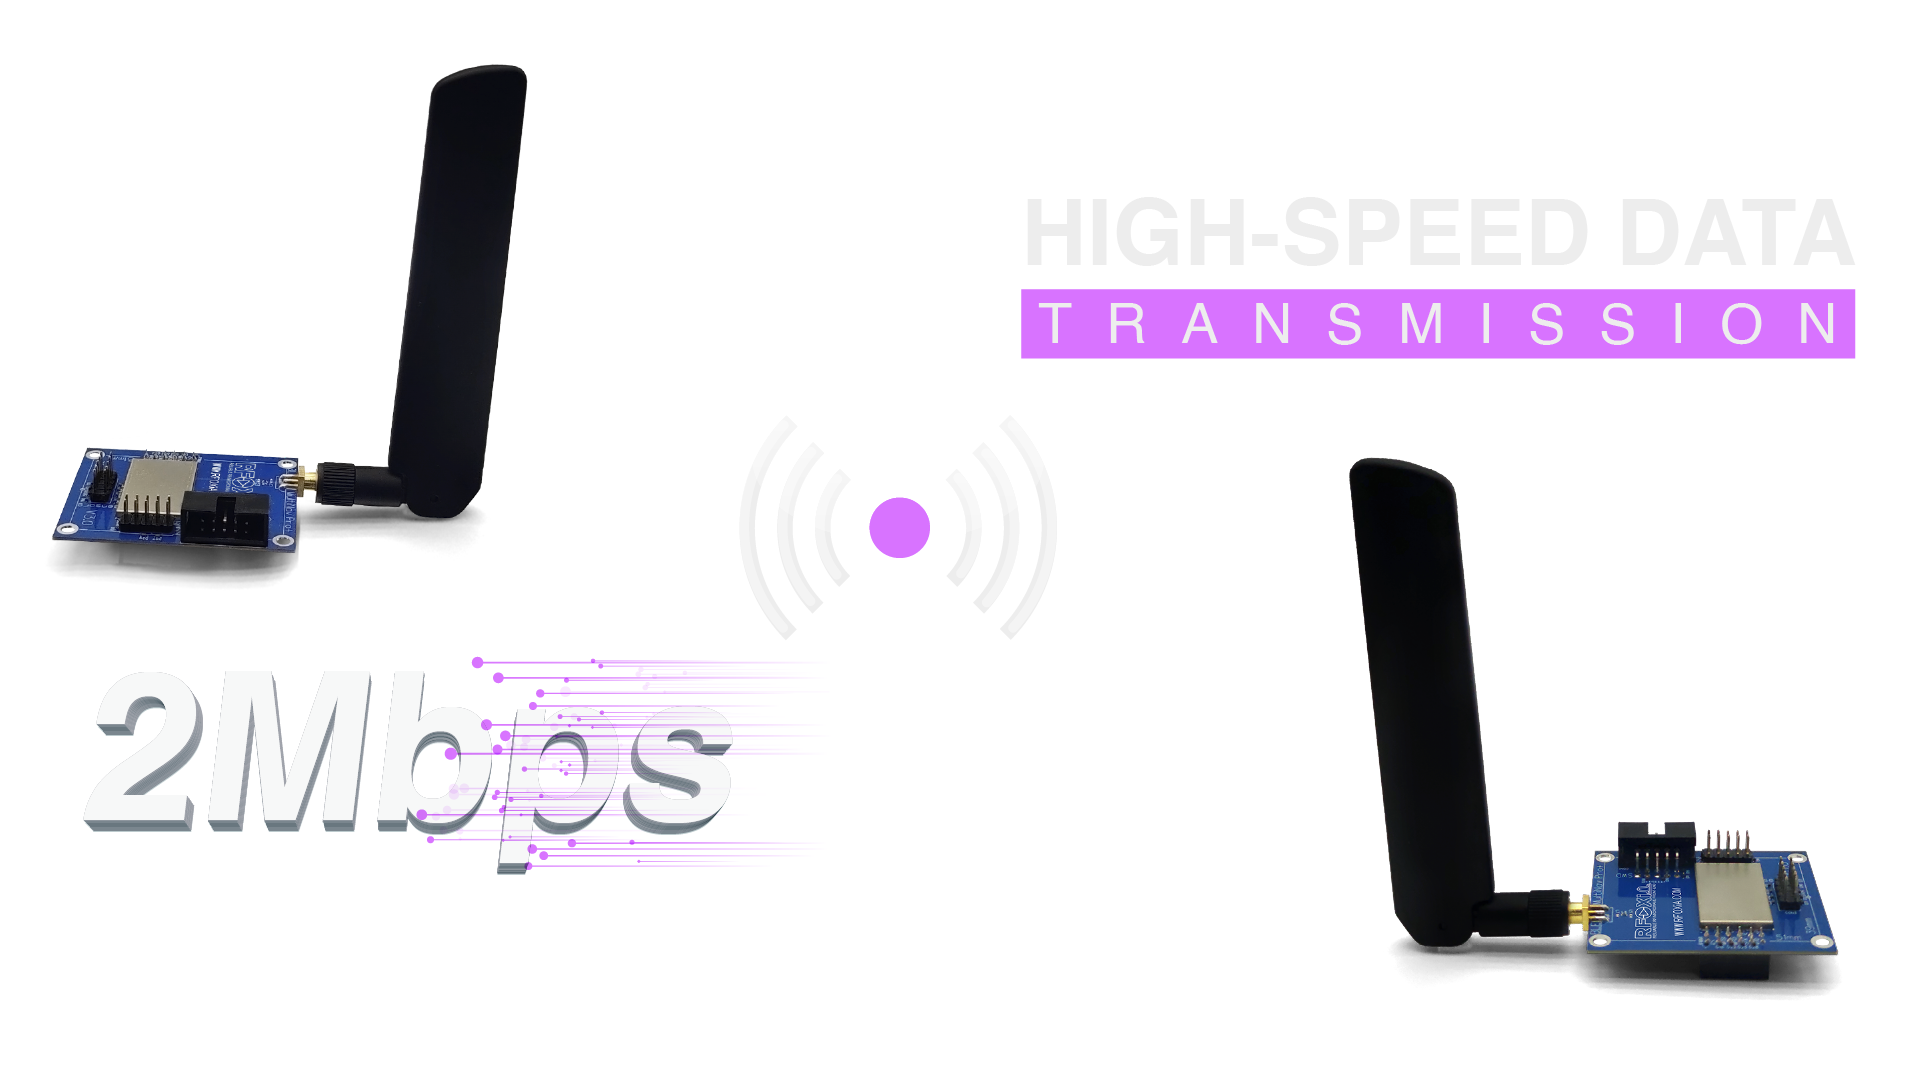
BLE 5.0 introduced Long Range PHY modes (Coded PHY) that trade data rate for extended range through forward error correction. The MultiNav Pro+ supports standard 2Mbps PHY for high-speed applications. For maximum range scenarios, you can configure Coded PHY (S=8 mode) which extends range at the cost of throughput — useful for low-data-rate telemetry at extreme distances.
Connection Interval
For real-time control applications (drone flight), use shorter connection intervals (7.5ms–15ms). For telemetry and monitoring applications where latency tolerance is higher, longer intervals (100ms–500ms) reduce power consumption.
Step 5: Building a Basic Long-Range Data Link
Defining Your GATT Services
For a bidirectional data link, define a custom GATT service with two characteristics:
- TX Characteristic (write) — data flowing from central to peripheral
- RX Characteristic (notify) — data flowing from peripheral to central
This Nordic UART Service (NUS) style architecture is simple, well-understood, and works well for most Arduino-style applications.
Application Loop Structure
A basic application loop on the peripheral (remote) node:
while(1) {
  // Read sensor or application data
  float temperature = read_sensor();
  float altitude = read_gnss_altitude();

  // Package into notification payload
  uint8_t payload[8];
  memcpy(payload, &temperature, 4);
  memcpy(payload + 4, &altitude, 4);

  // Send via BLE notification
  aci_gatt_update_char_value(service_handle, rx_char_handle,
                              0, sizeof(payload), payload);

  // Process any received commands
  if(command_received) {
    process_command(received_command);
  }

  HAL_Delay(100); // 10Hz update rate
}
On the central (ground station) node, mirror this structure with write operations for commands and notification callbacks for received data.
Step 6: Integrating with the RFOXiA Connect App
For drone control and monitoring applications, the RFOXiA Connect app dramatically accelerates development by providing a ready-made control interface you don't have to build yourself.
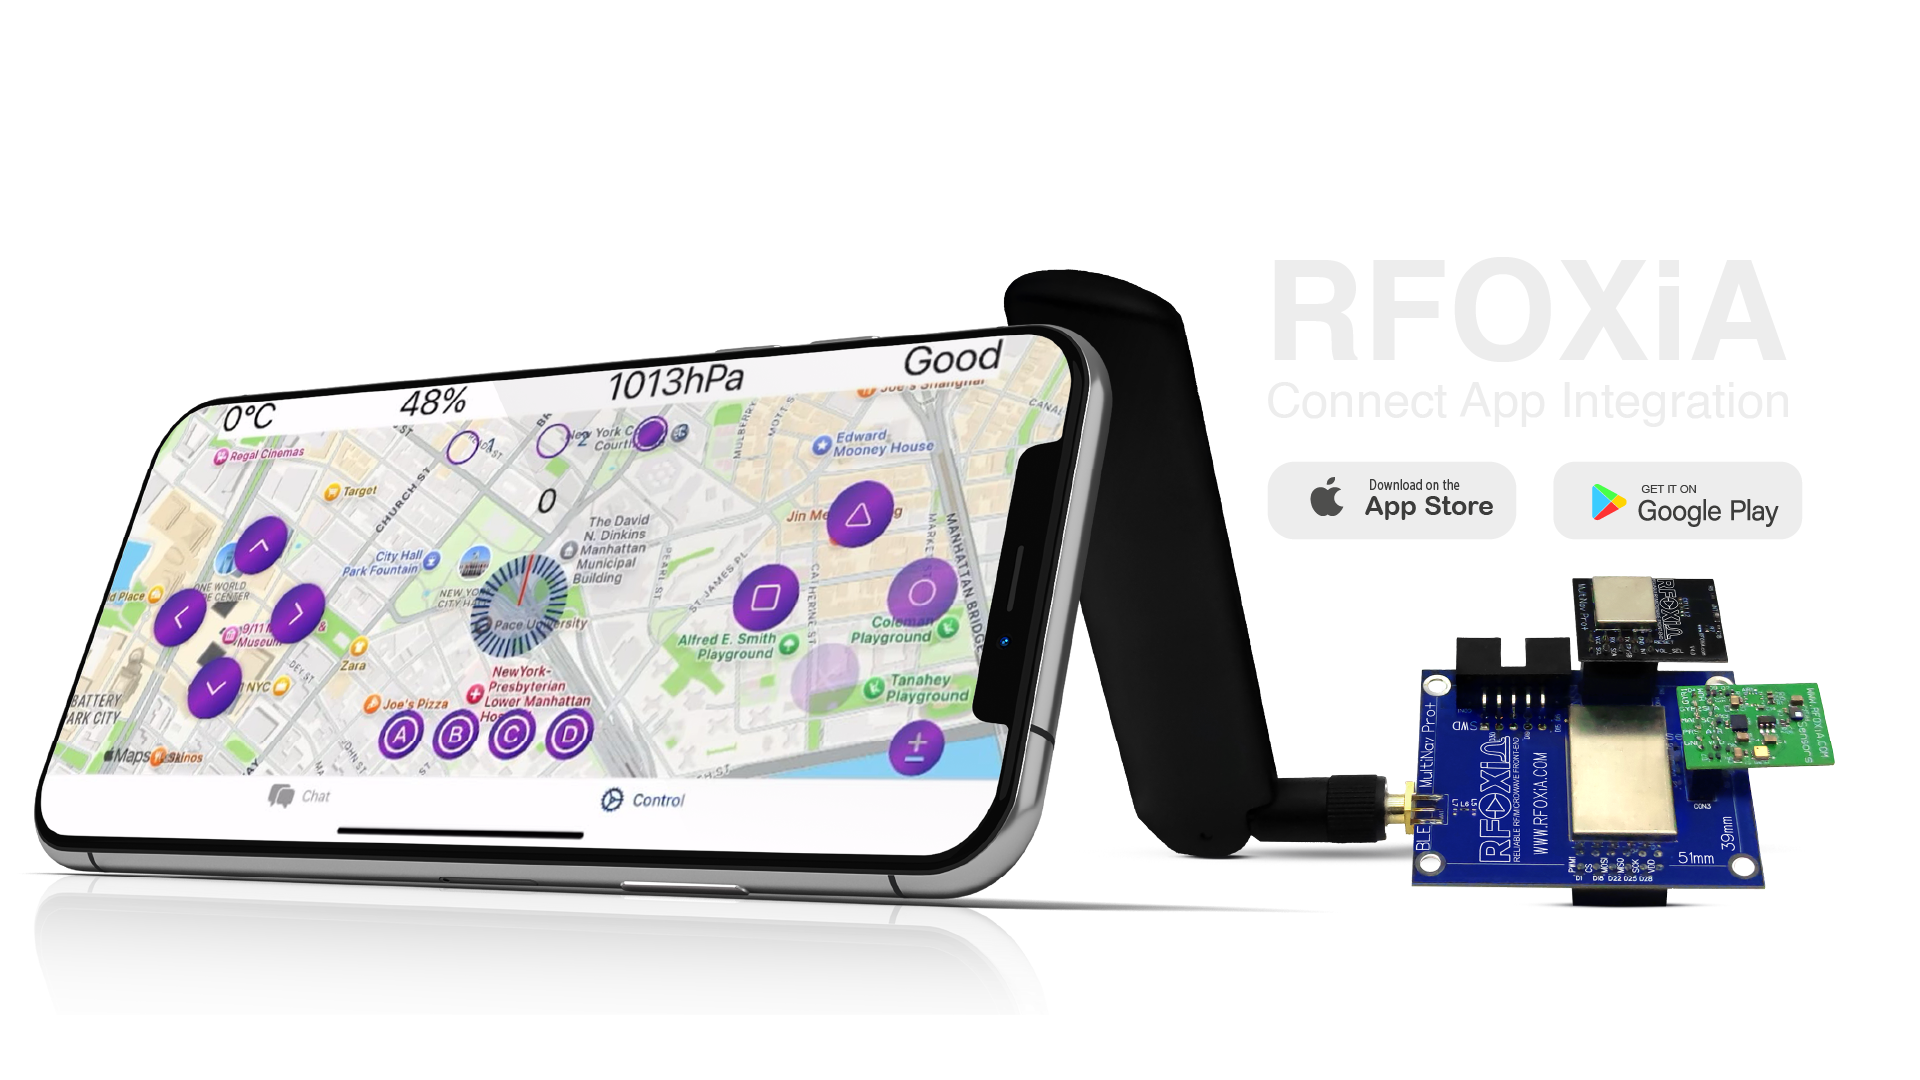
The app provides:
- PS5-style controller interface for drone and robot control
- Live map view with real-time GPS tracking from the GNSS module
- Live sensor data display — temperature, humidity, pressure, air quality, IMU data
- Automation center for programmable control sequences
- Completely internet-independent operation — the BLE link is all it needs
To integrate your firmware with the app, implement the RFOXiA BLE protocol in your peripheral firmware. The protocol documentation is available in the RFOXiA Club Dev Hub. The AI Firmware Builder can also generate app-compatible firmware automatically when you describe your application requirements in plain language.
Step 7: BLE Chat — Internet-Free Mesh Communication
One of the most powerful features of the MultiNav Pro+ BLE module that goes beyond typical drone tutorials is the BLE Chat functionality.
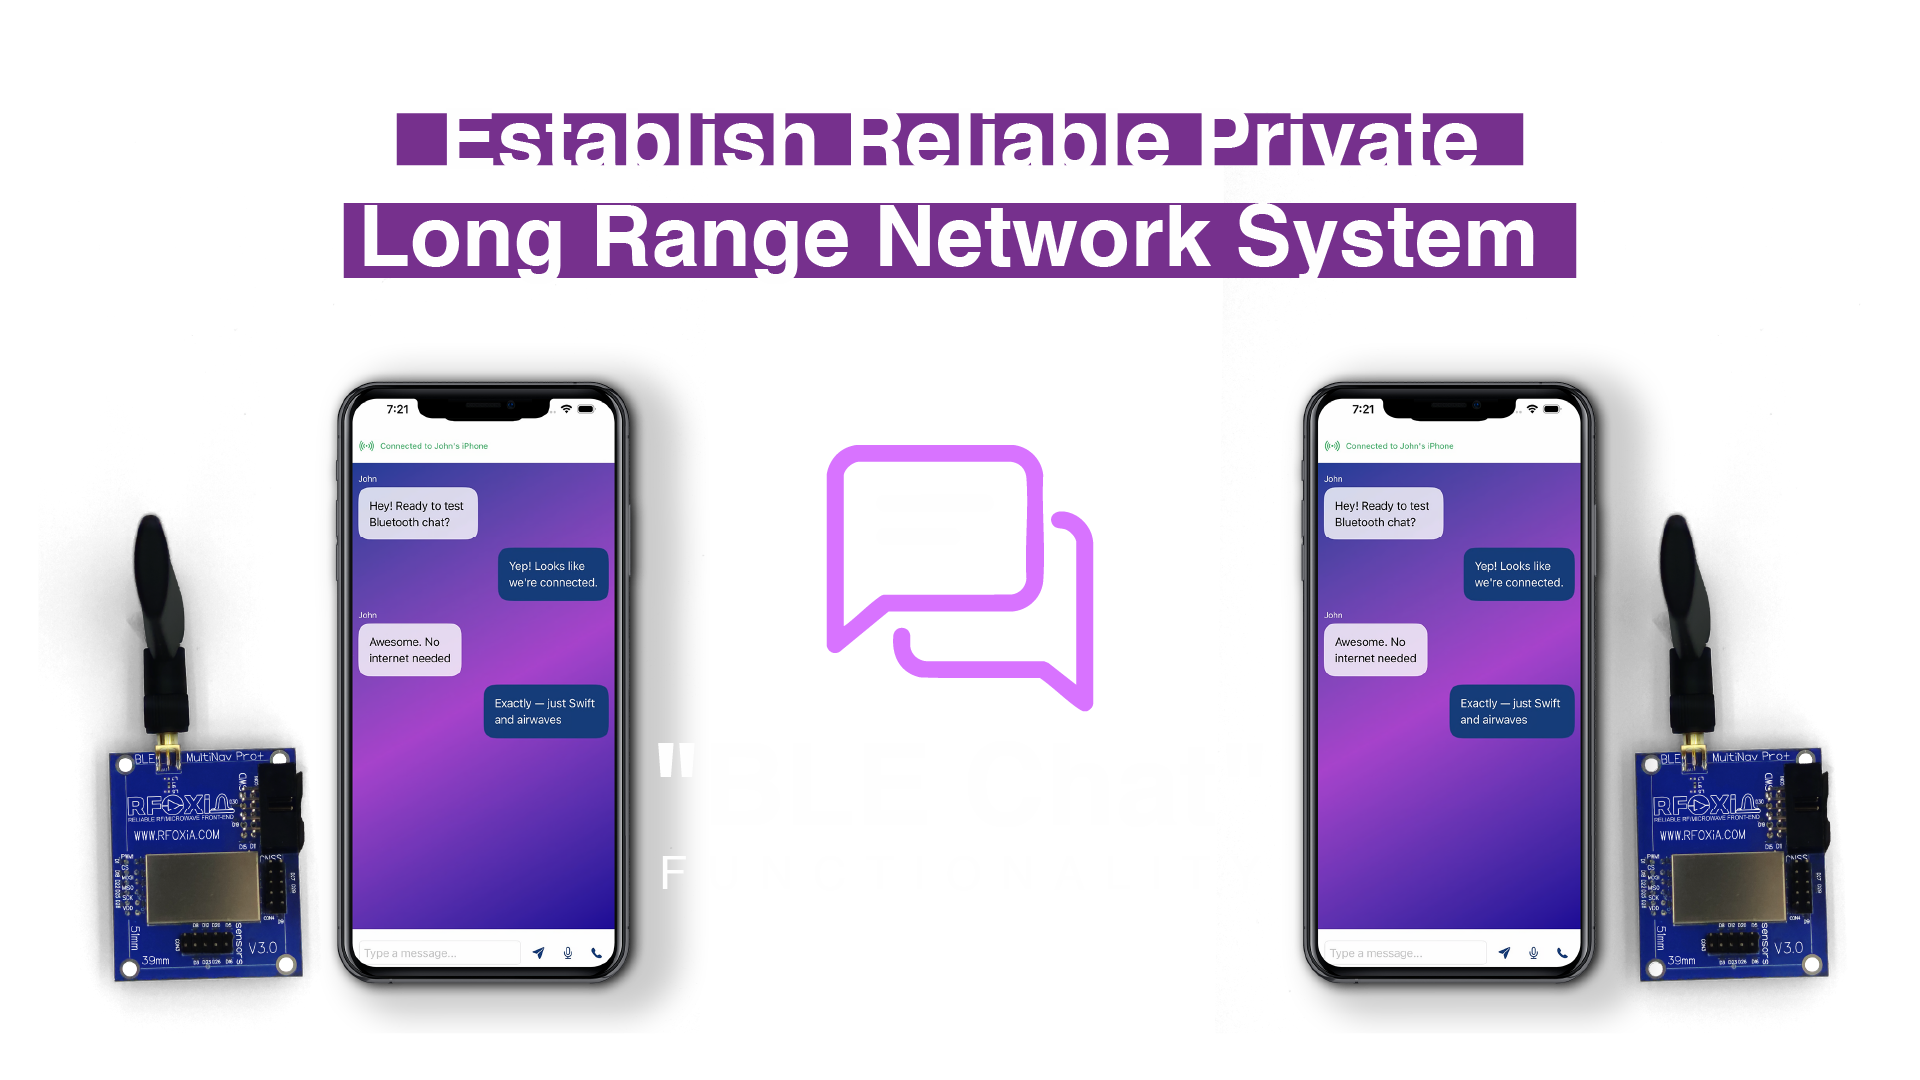
BLE Chat enables direct device-to-device communication for text, data, and voice — completely without internet infrastructure. Applications include:
- Field team coordination in areas without cellular coverage
- Disaster response where infrastructure has been damaged
- Remote expedition communication — mountains, deserts, ocean environments
- Construction site coordination across large areas
- Event operations where radio silence is required
From a firmware perspective, BLE Chat operates as a message relay layer over the same BLE link used for data telemetry. Each module acts as both a node and a relay, enabling mesh-style message propagation across multiple hops.
Step 8: Timing and Synchronization with the Integrated RTC
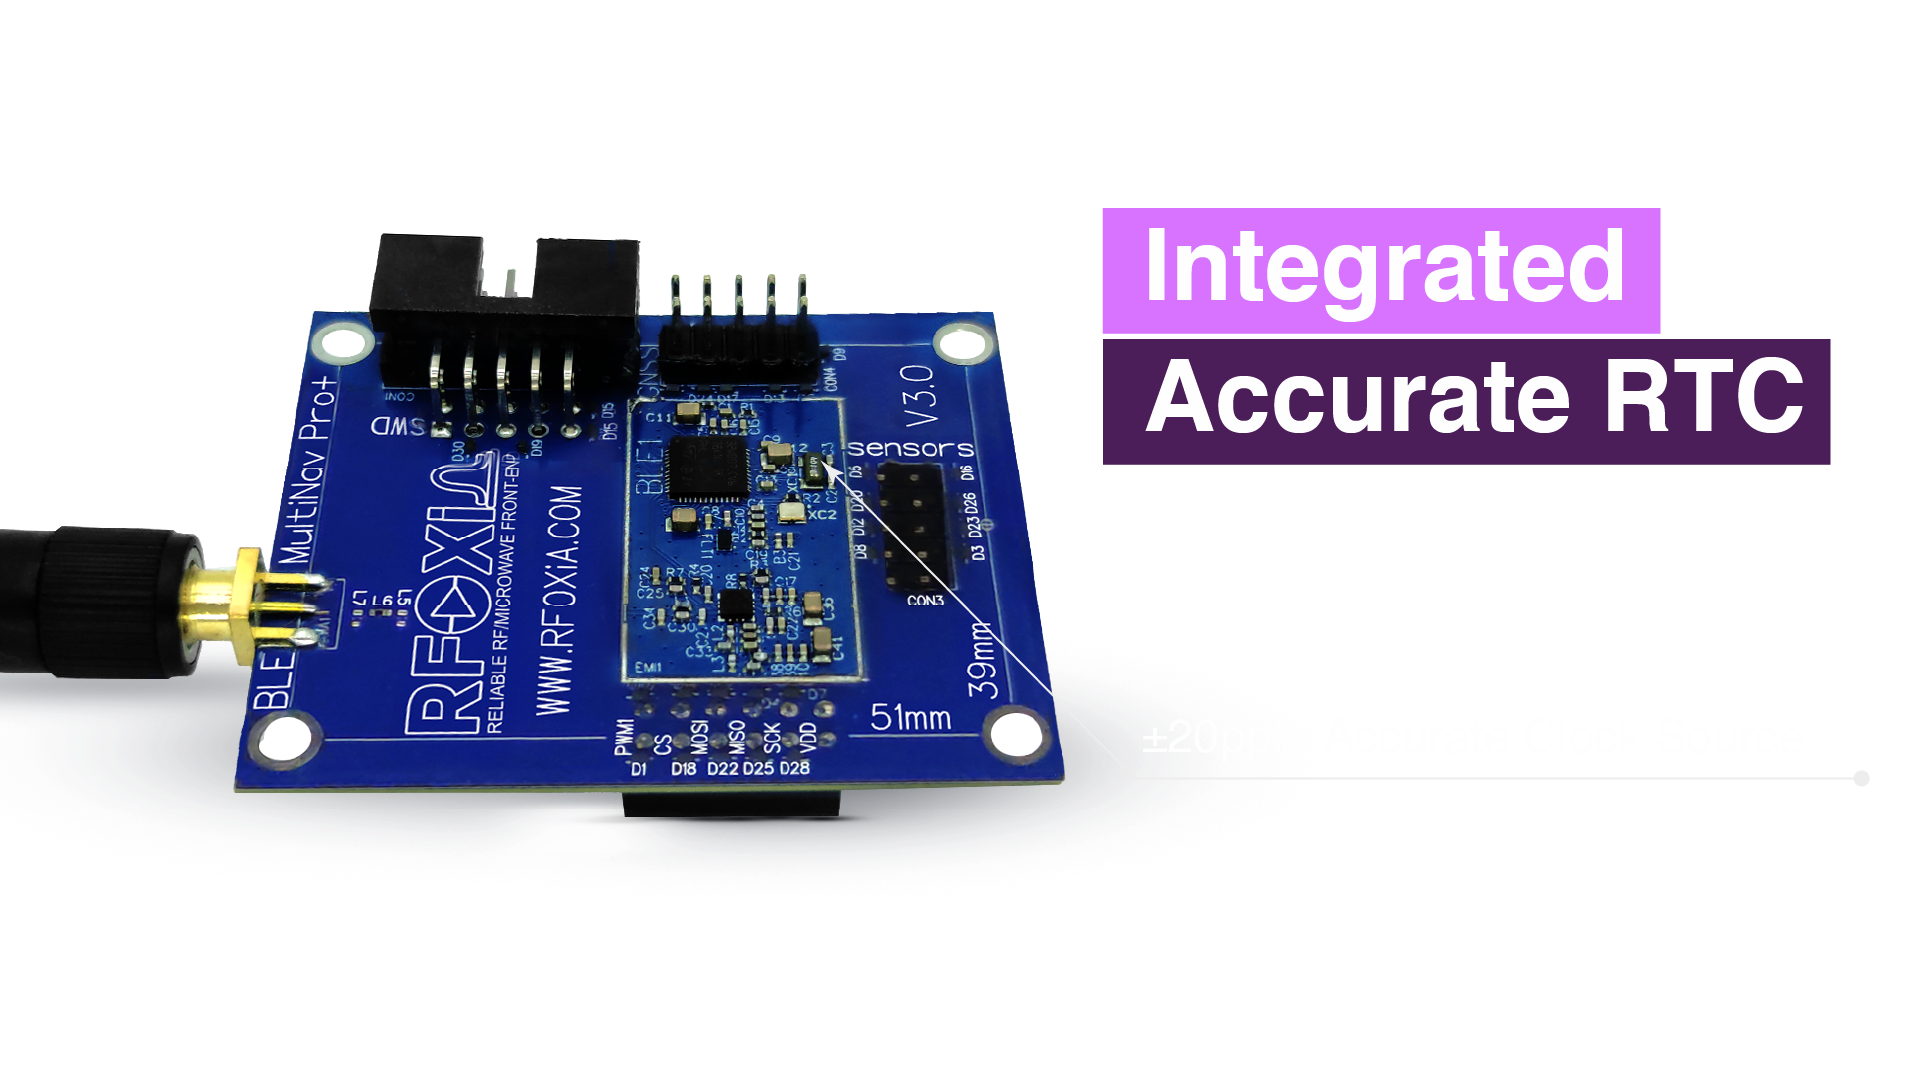
For applications involving multiple modules, sensor fusion, or data logging, accurate timing matters. The MultiNav Pro+ BLE integrates an RTC crystal for precise timekeeping independent of the processor clock.
In firmware, initialize the RTC during startup and timestamp all data packets before transmission. On the receiving end, use timestamps to reconstruct accurate event sequences even if packet arrival timing varies. This is particularly important for:
- GPS-correlated sensor data logging
- Multi-node synchronized measurements
- Flight data recorder applications
- Network latency measurement and compensation
Step 9: Ecosystem Integration — Building Complete Systems
The MultiNav Pro+ BLE module is one node in a larger ecosystem. For complete autonomous systems, it integrates directly with:
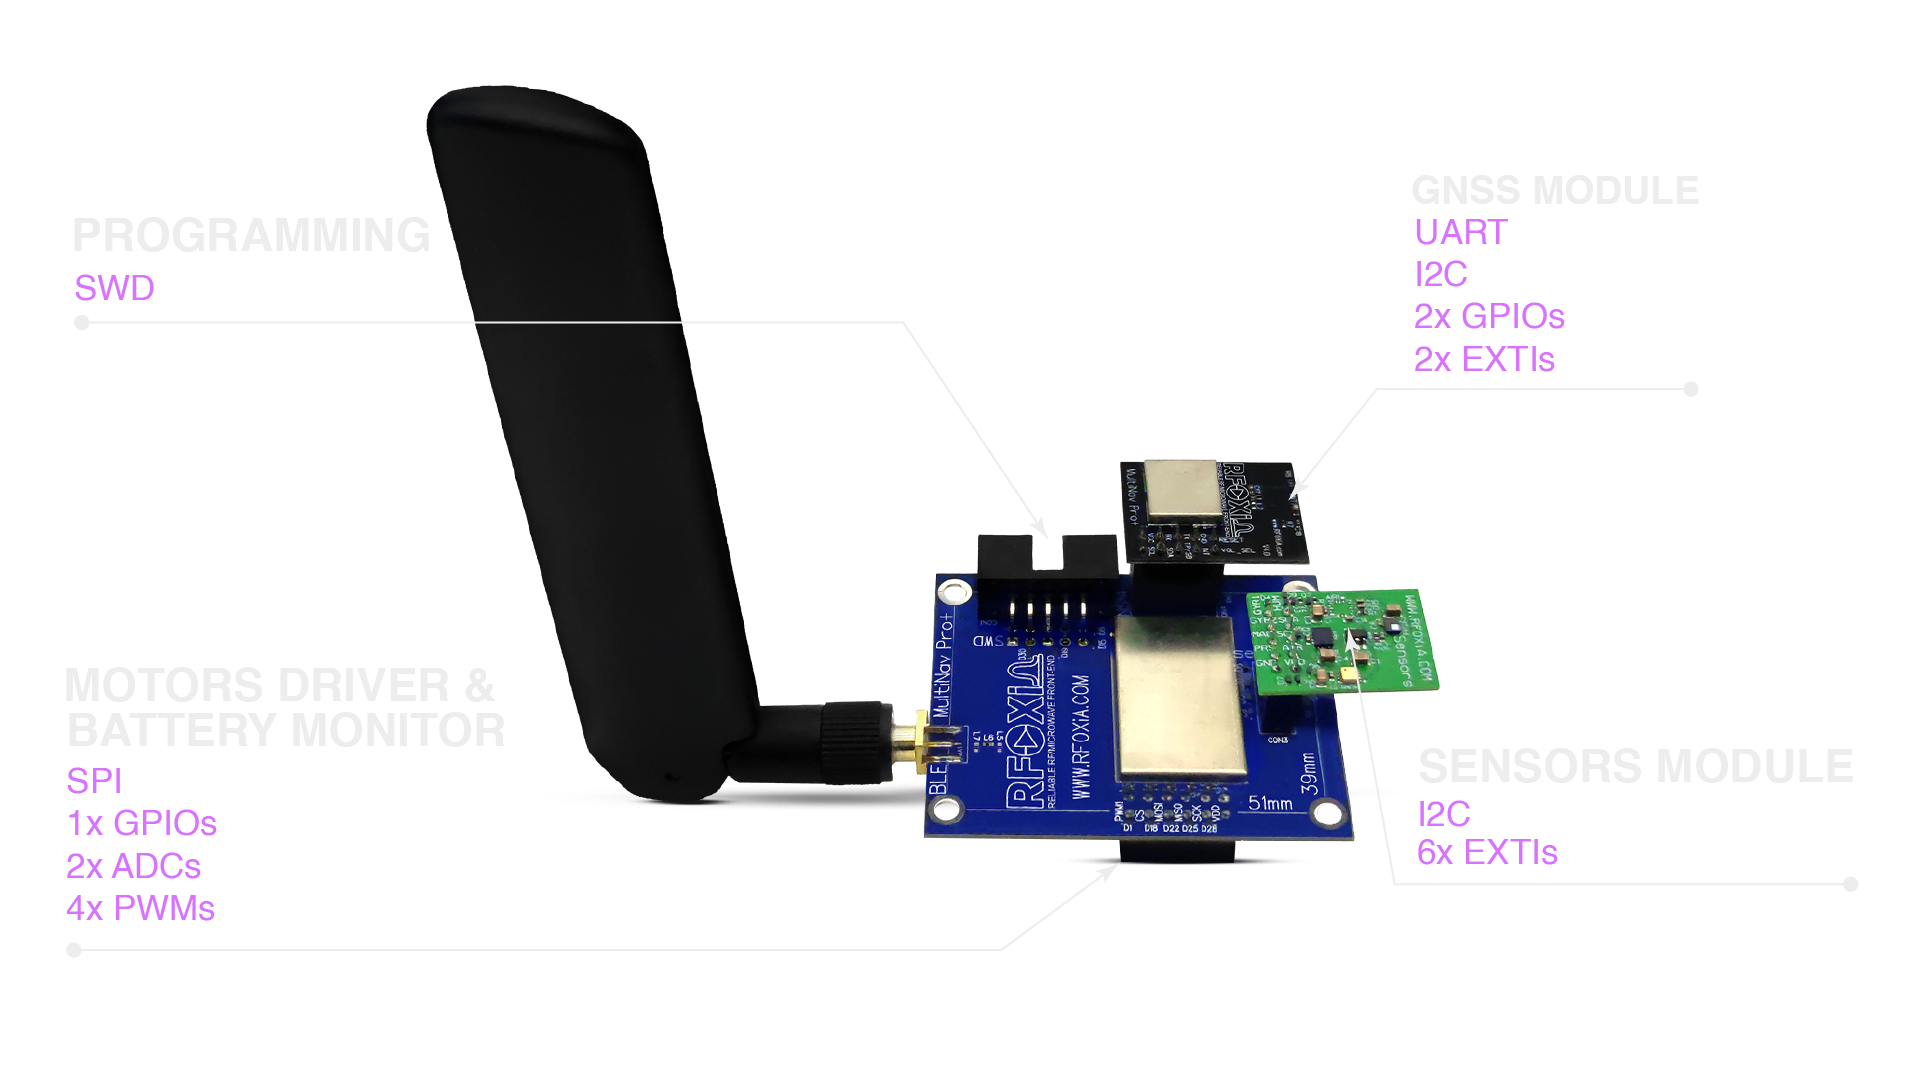
- MultiNav Pro+ GNSS Module — 1.5m accuracy, 18Hz fix rate for fast-moving platforms
- MultiNav Pro+ Sensors Module — temperature, humidity, pressure, air quality, accelerometer, gyroscope, magnetometer in one board
- Power/Program Kit — supercapacitor power, 5-minute charge, 24-hour runtime
This combination gives you a complete wireless sensing, computing, and communication platform in a compact stackable form factor. The Developer Bundle packages all four modules together at $199 — the only kit on the market combining long-range BLE, precision GNSS, multi-sensor environmental monitoring, and professional power management.
For developers starting their build, the RFOXiA Long Range Bluetooth Module is the entry point — two modules for $59, FCC certified, open source, ready to program.
Range Testing Protocol
When you're ready to test your build outdoors, follow this structured testing protocol to accurately characterize your link:
Equipment Setup
- Mount one module stationary at a known point, elevated at least 1–2 meters
- Use the second module as the moving endpoint, start at 100m and step out in increments
- Log RSSI (Received Signal Strength Indicator) at each distance point
- Note any packet loss percentage at each distance
Test Variables
- Antenna orientation — vertical vs. tilted affects radiation pattern
- Elevation — even 10 meters of elevation dramatically extends ground-to-ground range
- Environment — open field outperforms suburban or forest by 3–5x
- Interference — 2.4GHz WiFi congestion in urban areas reduces effective range
Interpreting Results
Expect ground-to-ground performance of 1–5KM depending on terrain and environment. Elevation is the single biggest factor — if you're consistently falling short of expected range, the first thing to try is raising antenna height, not adjusting firmware.
Using the AI Firmware Builder for Custom Applications
If you have a specific application in mind but aren't comfortable writing STM32 firmware from scratch, the RFOXiA Club AI Firmware Builder handles it. Describe your application in plain language:
"I need the BLE module to read three analog sensor inputs at 10Hz, transmit the values via BLE notification to a connected smartphone, and receive a PWM duty cycle value to control a servo output. Log all data with RTC timestamps."
The AI generates complete, production-ready firmware with full source code that you can review, modify, and flash directly to your module. This is one of the most powerful features of the RFOXiA ecosystem for developers who need custom behavior without months of firmware development time.
Real-World Applications This Tutorial Enables
Once you've completed this arduino long range bluetooth tutorial and have your modules programmed and range-tested, the application space opens up significantly:
FPV Drone Control: PS5-style controller interface via RFOXiA Connect, up to 20KM man-to-drone range, live GPS tracking and telemetry
UAV Telemetry: Battery voltage, GPS position, altitude, attitude data streamed at 2Mbps to ground station — no proprietary RC system required
IoT Sensor Networks: Deploy sensor nodes across a 5KM radius reporting to a central gateway, all on Bluetooth without cellular SIM cards or WiFi infrastructure
Search and Rescue: Multi-node mesh communication for field teams in areas without cellular coverage, paired with GNSS tracking
Environmental Monitoring: Distributed sensor arrays reporting environmental conditions — and through the RFOXiA data network, these deployments can earn daily rewards while contributing to a global environmental dataset
Agricultural Monitoring: Soil condition sensors, weather stations, and equipment trackers across large farm areas communicating without infrastructure
Troubleshooting Common Issues
Module not detected by STLink: Verify SWD connections — SWDIO and SWDCLK are easy to swap. Check that the module is powered. Some STLink versions require firmware updates.
BLE connection dropping at 500m: This is almost certainly a power issue, not a code issue. Verify 3.3V supply is stable under load. Weak power supplies cause RF instability well before the theoretical distance limit.
RSSI lower than expected: Check antenna orientation and clearance. Metal objects within 2cm of the antenna significantly attenuate the signal. Also verify TX power is set to maximum in firmware.
App not connecting: Verify the module is advertising in the correct format expected by RFOXiA Connect. Check the BLE protocol documentation in the Dev Hub. The AI Firmware Builder can generate app-compatible advertising configuration automatically.
Next Steps: From Tutorial to Product
This tutorial gets you from zero to a working long-range Bluetooth link. The MultiNav Pro+ ecosystem takes you from a working link to a complete product.
If you're building for a specific application — drone control, environmental monitoring, field communication, robotics — the RFOXiA Club Dev Hub has resources, community projects, and AI firmware generation to accelerate every stage of development.
The hardware is FCC certified. The firmware is open source. The range is real.
Start with two modules, a copy of the firmware repository, and a weekend. The results will change how you think about what Bluetooth can do.
Get your MultiNav Pro+ BLE Modules here: RFOXiA Long Range Bluetooth Module — two units for $59, in stock, ready to ship.
Summary: Why This Arduino Long Range Bluetooth Tutorial is Different
Every other arduino long range bluetooth tutorial on the internet is working around a hardware limitation — trying to squeeze 200 meters out of a module designed for 80. This tutorial starts with hardware that was engineered for range from the ground up.
- 50KM drone-to-drone range — not theoretical, not a marketing claim, a real measured specification
- 2Mbps data rate — fast enough for real-time control and high-frequency telemetry
- FCC certified — legal to deploy in the United States without additional certification steps
- Open source firmware — full visibility into every layer of the stack
- Complete ecosystem — BLE module, GNSS, sensors, power management, mobile app, AI firmware builder, data monetization network
- $59 for two units — the only long-range BLE solution at this price point anywhere in the market
The gap between commodity Bluetooth and military-grade long-range wireless has been real, frustrating, and expensive for too long. RFOXiA built the hardware to close that gap — and this tutorial is how you start using it.
Written by: Moamen Mohamed LinkedIn